One of the most useful features of the Post Pay Counter PRO is the ability to manage payments. This resource will guide you through how to mark authors and posts as paid, and how to use the plugin to pay authors through PayPal.
Marking as paid is useful especially because it allows to automate payment managing! You will not need to take care of how much you paid authors last month and how much you should pay them the current month: the plugin stores the payment history and makes all the math on your behalf.
Set up permissions
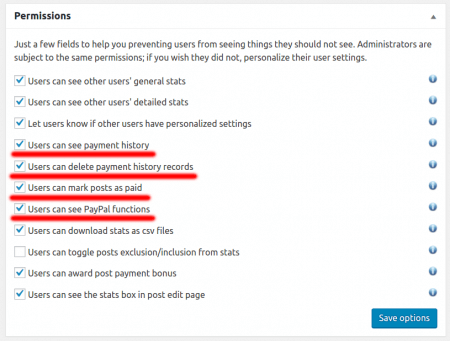
Post Pay Counter has detailed permission settings to keep users from accessing features they should not. You may not yet have access to payment features because you lack permissions yourself.
Head over to Post Pay Counter > Options and look for the Permissions box. Start by ticking all payment-related permissions. You may play around with them and decide which exactly you want to have active, but we suggest having them all on at the beginning so you can see all payment features in action. Later on, when your setup is complete, you may want to personalize the users’ settings in order to hide those features from normal users and restrict them to yourself only.
Mark posts and authors as paid
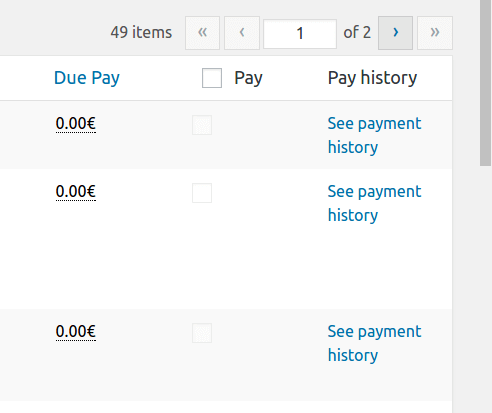
Payments are done in the stats page (Post Pay Counter > Stats). Payment features are available both in the general stats view and in the authors detailed stats view. There are three columns that are relevant when it comes to payments:
- Due pay: this is the amount you will pay. It can be different from the
Total paymentvalue, because it keeps track of past payments as well, subtracting them from the total amount. - Pay: if checked, the post/author is enlisted for payment.
- Payment history: click to display the post/author payment history, to review past payments.
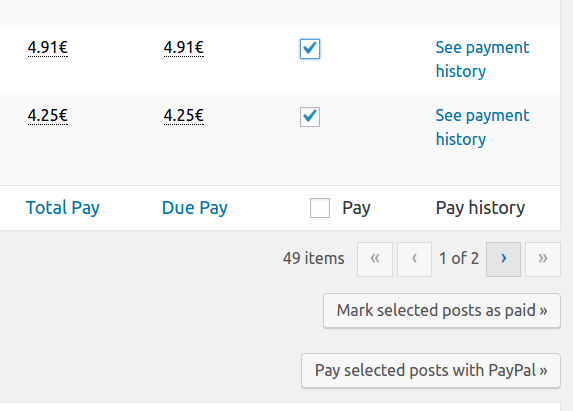 To pay some posts or authors, tick the relevant checkboxes alongside their names, and scroll down to the bottom of the stats table to reveal the payment buttons. There are two choices:
 Mark as paid, or pay through PayPal. PayPal payments will be described later on, but the flow is virtually the same. Once you have selected all items you want to pay, click on Mark selected posts as paid.
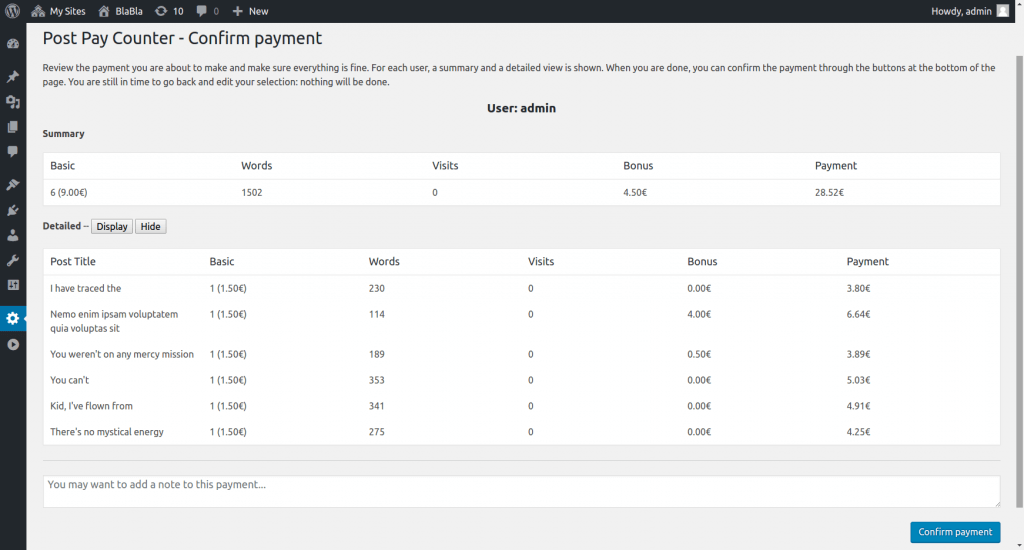
The Confirm payment page opens up, where you can review the payment you are about to make in detail. Author and posts details are showed, and the detailed view can be collapsed. It is also possible to add a note to the payment for future reference.
To confirm the transaction, click on the Confirm Payment button at the bottom-right of the page. The request is processed and, if no errors occur, you will be redirected back to the stats page you were looking at before the payment. At this point, all paid posts/authors show up with a 0.00 Due Pay amount. The Pay checkbox has also been disabled, since nothing is left to pay.
If a post gathers new value after it has been paid, its Due Pay gets updated accordingly. For example, if more words are added to the post, or if it receives more visits, or if it generates more Adsense revenue, the new income will add up to the Due Pay amount. When you will pay that same post again later on, you will only pay for the newly-generated income: the plugin automatically subtracts the already paid amount.
Review the payment history
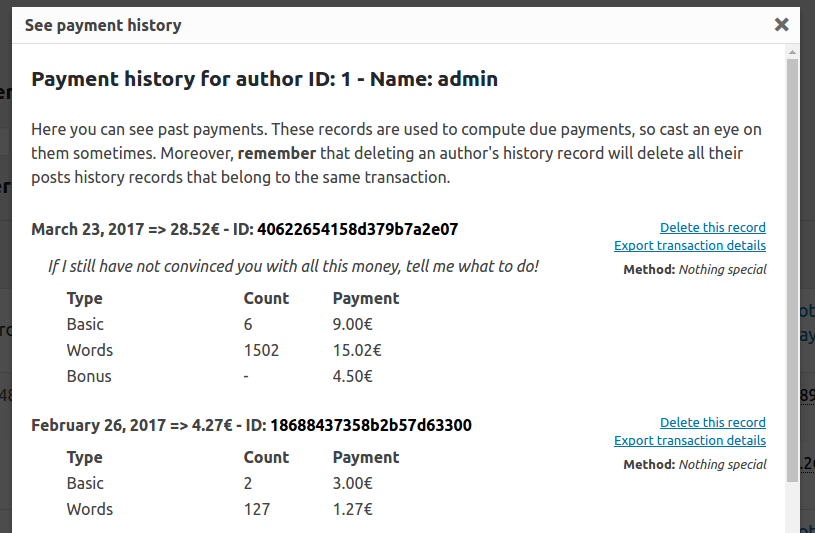
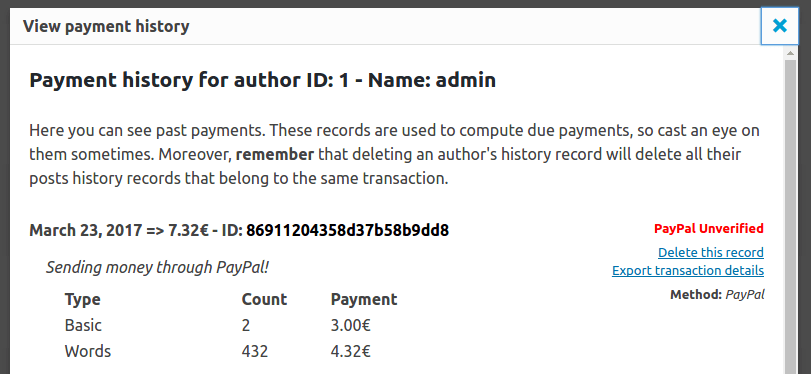
Marking as paid would be quite useless without the ability to review past transactions. The See payment history link in each row opens a hovering dialog with details of past transactions for the given post/author.
After making the test payment above, the payment history for user admin has a new entry. Besides knowing the date and amount of payment, full details of the transaction are shown, including any optional note. The Export transaction details link besides each entry allows to download the detailed breakdown of the payment in csv format for offline storage or further accounting.
Payment history entries can be deleted through the apt link to their right. Doing so will restore the Due Pay amounts to how they were before the transaction happened. Deleting an author payment history record also deletes all the related post payment history records.
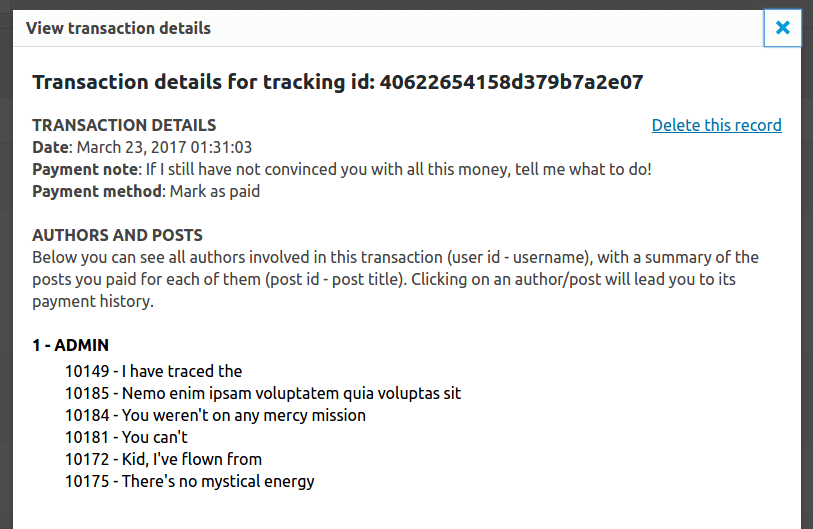
Each transaction has a unique identifier (ID), which is also a link to a view containing the details for that transaction. This is useful if you paid multiple authors in the same transaction, and displays all posts/authors involved in that transaction. Click on authors/posts to reach their individual payment histories.
Execute PayPal payments
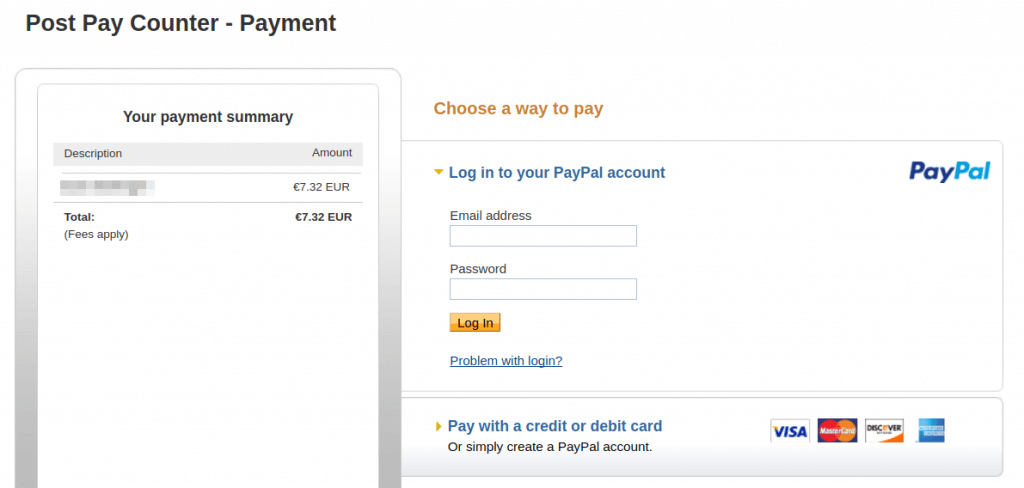
After selecting the items you wish to pay for, there is also the option of paying through PayPal directly. Both simple mark as paid and pay through PayPal will get you to the Confirm Payment page, as shown above. However, PayPal payments redirect to PayPal to enter your credentials and authorize the payment. One limitation about PayPal payments is that you may not pay more than six authors at once.
You can either use your PayPal account, or pay with a credit card through PayPal. In both cases, the plugin does not store any confidential data. For this reason, you need to enter your credentials every time. This may seem a bit of a hassle, but we do not want the plugin to have authorization to issue payments on your behalf. PayPal has its own set of settings in Post Pay Counter, which you should review before making the first payment: check out the relevant documentation page.
After confirming the payment, you are redirected back to the stats page. A new payment history record gets added just as it happens with marking as paid, but the PayPal entries have a distinctive label that distinguishes them from simple mark as paid transactions. In case you have PayPal IPN active both in Post Pay Counter and in PayPal settings, the red PayPal Unverified badge will turn to a green Verified Badge when the transaction is successfully processed and notified back through PayPal IPN.
Enter authors’ PayPal email addresses
Authors can input the PayPal email address they want to be paid to either in their profile page, or in their BuddyPress member page. You can also set up a different, public page in which to place the PRO apt shortcode. Learn more in the relevant documentation page.
So there you go! This is how payments management becomes easy with Post Pay Counter PRO!
